Django搭建敏感图片检测系统(二)
项目需求
目前,我已经实现了一个函数detect_sensitive(img_path)
1 | def detect_sensitive(img_path): |
它的作用是:传入一张图片,先利用训练好的检测和识别模型识别出图片中的文字,再判断文字是否为敏感信息。最终的返回值有2个,分别为sentence和isSensitive,sentence代表图片中的文字,isSensitive代表这张图片所含的文字是否为敏感信息。
我希望借助这个函数搭建一个”敏感图片检测系统“,系统的需求为
- 上传一张图片
- 首先,在”白名单表“中查询这张图片是否存在,如果存在,直接将”白名单表“中的
statement和isSensitive字段返回;如果不存在,就将图片传入detect_sensitive()进行检查,得到返回值statement和isSensitive - 其次,如果
isSensitive为True,返回告警信息,并将告警信息存入一张”告警信息表“,同时将这张图片和它对应的敏感类型存入”白名单表“中;如果isSensitive为False,返回正常信息,并将这张图片和它对应的敏感类型存入”白名单表“中。
数据库的物理结构设计如下:
”白名单表“用于存储用户上传的图片,白名单里的图片无需通过敏感信息检测模块,表内容包含编号、图片MD5值、statement、isSensitive。
表1 白名单表结构
| 列名 | 数据类型 | 主键 | 注释 |
|---|---|---|---|
| id | bigint | Primary Key | 记录ID |
| img_md5 | varchar(32) | 图片MD5值 | |
| isSensitive | tinyint(1) | 图片是否敏感 | |
| statement | longtext | 图片中的文字 |
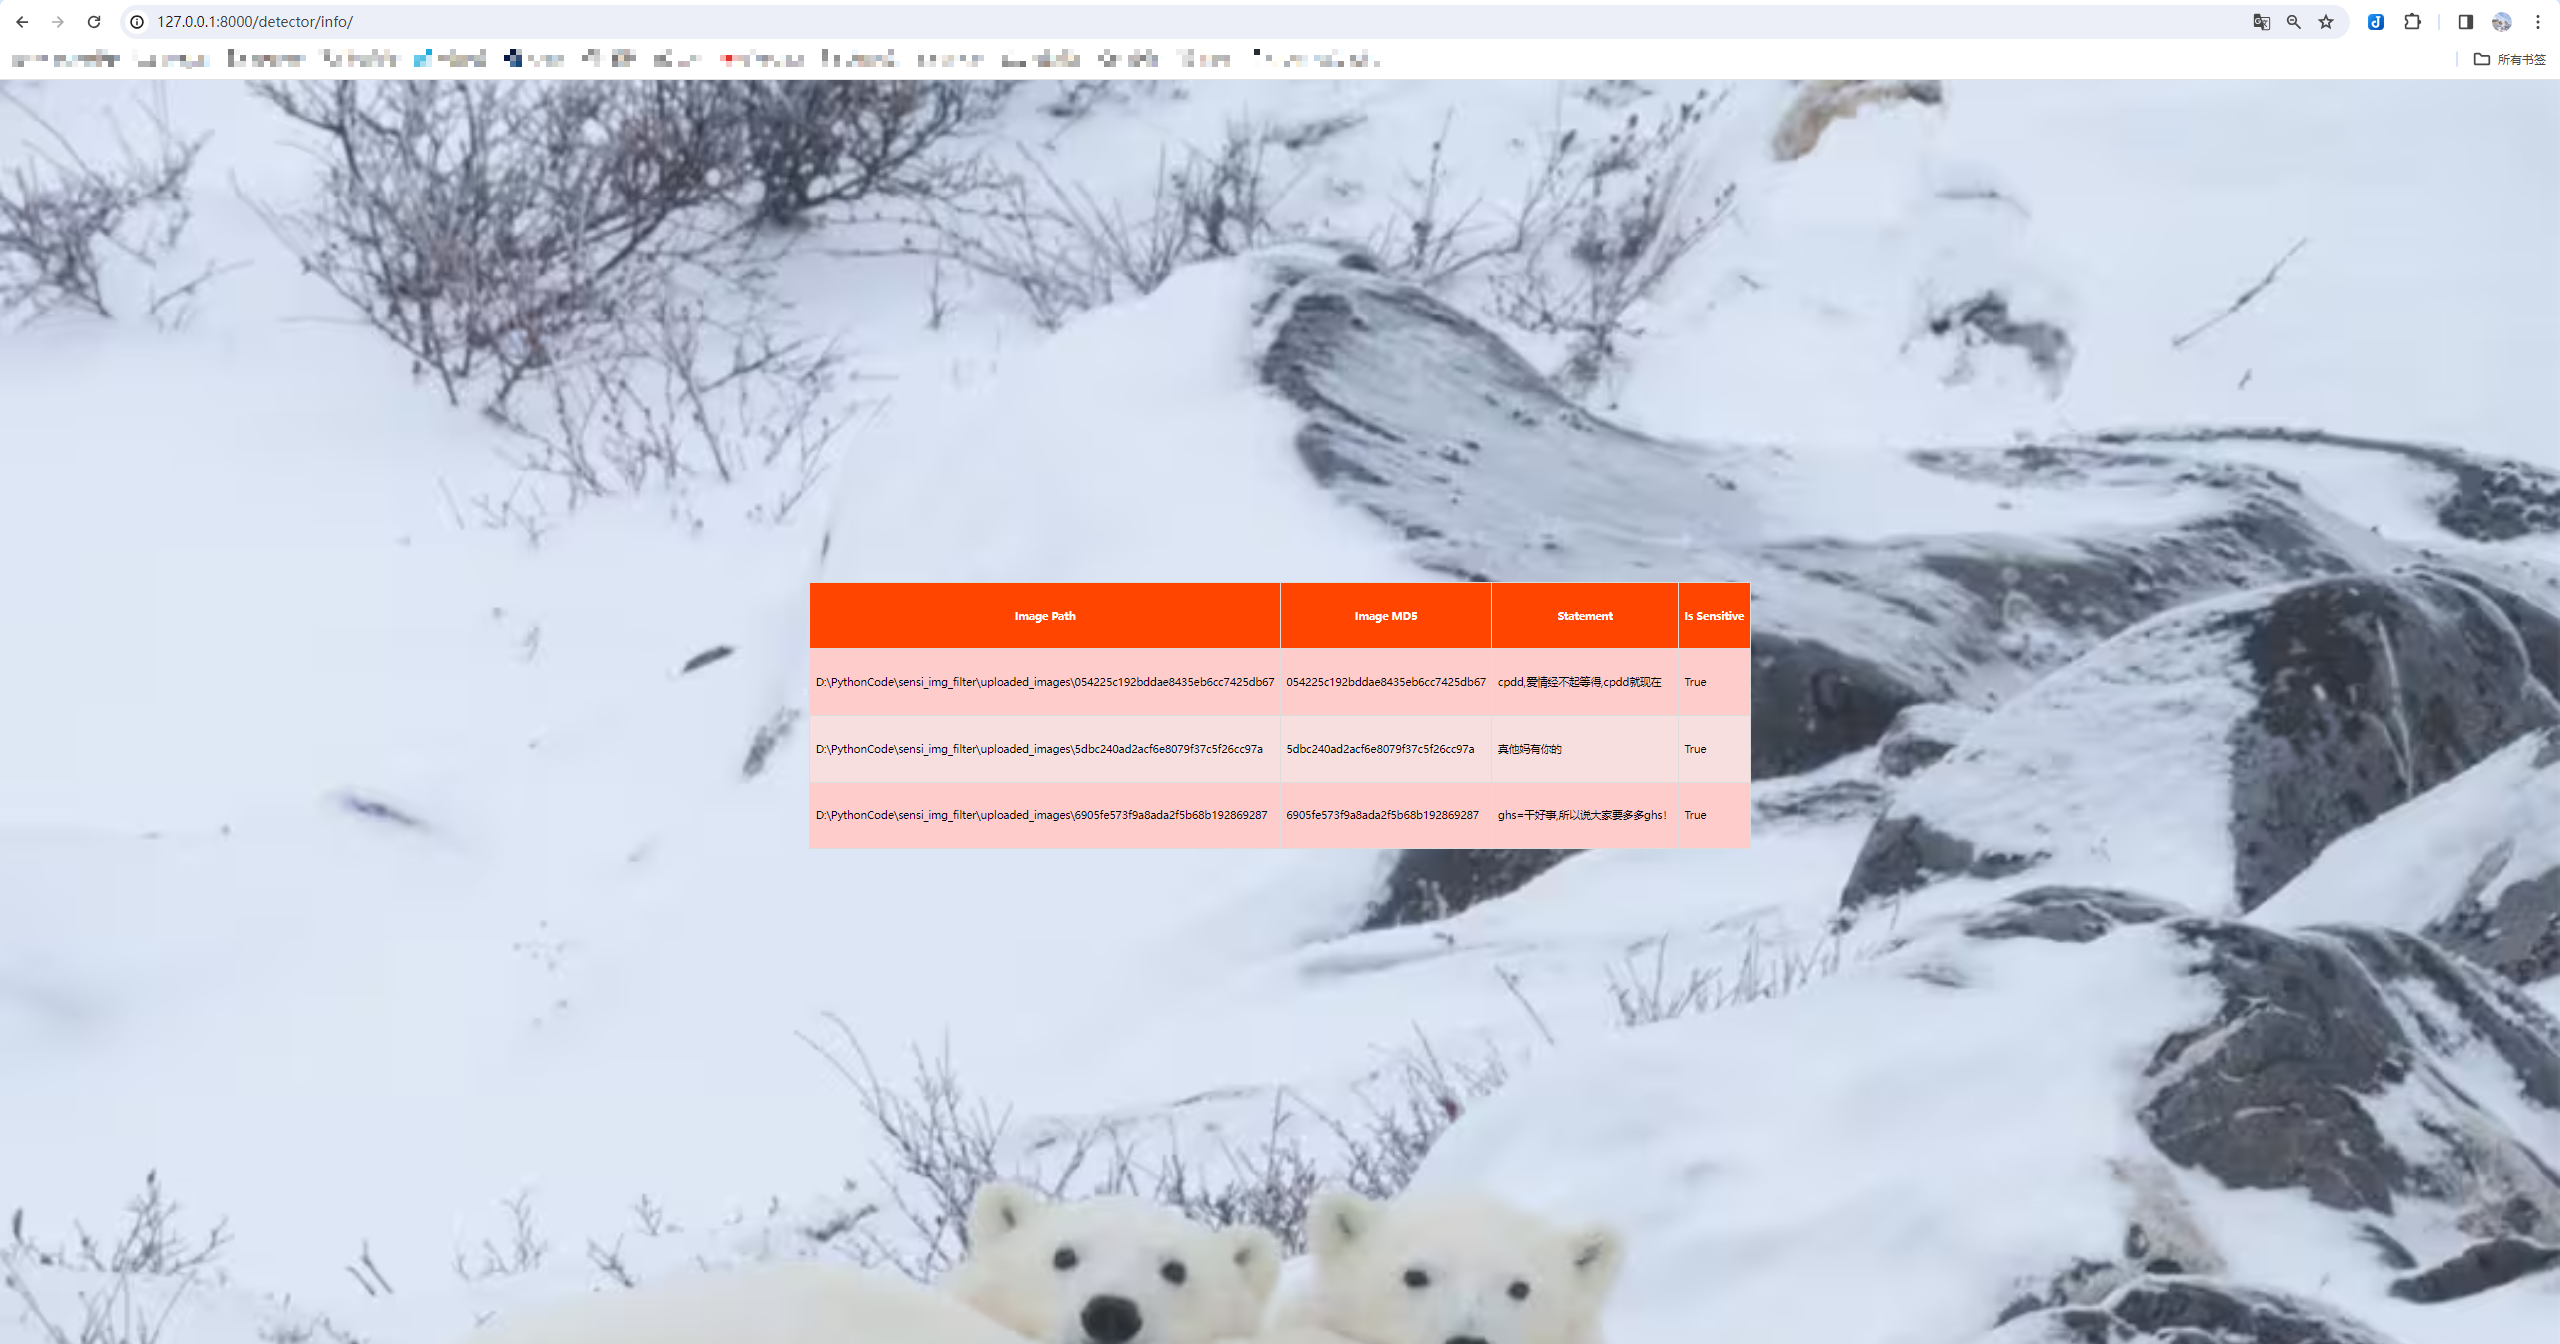
”告警信息表“包含以下字段:信息编号、图片路径、图片MD5值、statement、isSensitive。
表2 告警信息表结构
| 列名 | 数据类型 | 主键 | 注释 |
|---|---|---|---|
| id | bigint | Primary Key | 信息ID |
| img_path | varchar(255) | 图片路径 | |
| img_md5 | varchar(32) | 图片MD5值 | |
| statement | longtext | 图片中的文字 | |
| isSensitive | tinyint(1) | 图片是否敏感 |
我计划后端使用Django框架实现,前端使用html、css及JavaScript实现。
创建项目
- 创建虚拟环境
1 | conda create -n sensitiveFilter python=3.8 |
- 创建项目
项目名为sensi_img_filter
1 | cd D:\PythonCode |
创建成功的项目结构为:
2
3
4
5
6
7
8
manage.py
sensi_img_filter/
__init__.py
settings.py
urls.py
asgi.py
wsgi.py
启动服务器:
1 | cd sensi_img_filter # cd到外层的项目文件夹下 |
项目=(一个及以上的)应用程序 + 配置
创建应用
1 | # 应用名称为"detector" |
创建成功的应用结构为:
2
3
4
5
6
7
8
9
__init__.py
admin.py
apps.py
migrations/
__init__.py
models.py
tests.py
views.py
注册应用
在创建应用之后,我们需要将应用注册到项目中,让项目知道自己又多了一个应用,同时方便后期的数据迁移。将应用”detector”放到项目的setting.py(即sensi_img_filter/settings.py)的INSTALLED_APPS中
1 | # 修改mysite/settings.py,增加一行'detector.apps.DetectorConfig',完成注册 |
初始配置
引入应用配置文件到项目配置文件中
新建应用配置文件,用于配置应用"detector"下的url
1 | # 新增detector/urls.py, 用于配置应用"detector"下的url |
修改项目配置文件,引入应用配置文件
1 | # 修改sensi_img_filter/urls.py,将应用"polls"下的urls.py引入 |
测试配置文件是否正确引入
创建index view
1
2
3
4
5
6# 修改detecor/views.py,创建index view(仅为虚拟实现)
from django.http import HttpResponse
def index(request):
return HttpResponse("Hello, world. You're at the polls index.")在应用配置文件
detector/urls.py中添加url配置1
2
3
4
5
6
7
8
9
10
11# 在detector/urls.py中配置index view的url
from django.urls import path
from . import views
app_name = "detector"
urlpatterns = [
# ex:/detector/
# path("", views.index, name="index"),
]启动服务器后访问链接:http://127.0.0.1:8000/detector/,即可访问到index view,说明应用的配置文件已经正确引入到项目配置文件中
1
python manage.py runserver # 启动服务器
连接MySQL数据库
导入依赖
1
2
3# 首次连接mysql数据库需要在虚拟环境导入以下2个包
pip install pymysql
pip install mysqlclient修改项目的数据库配置
1
2
3
4
5
6
7
8
9
10
11
12
13# 在项目的settings.py(即sensi_img_filter/settings.py)中修改数据库配置
# 修改数据库配置——更改为mysql数据库
DATABASES = {
'default': {
'ENGINE': 'django.db.backends.mysql',
'NAME': 'info_filter', # 修改为数据库的名字
"USER": "root",
"PASSWORD": "123456xjy",
"HOST": "127.0.0.1",
"PORT": "3306",
}
}数据迁移
1
2# 执行数据迁移——将"sensi_img_filter/settings.py"中INSTALLED_APPS对应的数据表都创建出来(创建到上述的"info_filter"数据库中)
python manage.py migrate
修改静态文件默认位置
默认我们会将整个项目(可能包含多个应用)的静态文件(如css、js、images等)都放到项目路径下的static目录下,因此修改项目的setting.py(即sensi_img_filter/setting.py)中对静态文件默认路径的配置.
1 | # 修改前 |
具体实现
创建模型
创建模型
在detector/models.py中创建模型
1 | from django.db import models |
数据迁移
产生迁移文件(可以类比为生成SQL代码)
1
python manage.py makemigrations detector # 这里能执行成功多亏已经在项目的setting.py的INSTALLED_APPS中注册了新应用detector
执行迁移(类比为执行SQL代码)
1
2# 运行以下代码,即可将models.py中新创建的类,在数据库中创建出对应的数据表
python manage.py migrate如果在后期某张数据表需要发生变动,那么直接修改models.py中该类的定义,再次执行步骤1和2即可在数据表同步这一变动
创建视图
创建视图函数
在这里创建了form_view()和handle_upload()两个视图函数
1 | from django.shortcuts import render |
上述函数中用到的三个工具函数detect_sensitive, calculate_md5, save_image在utils目录下的utils.py文件夹。该文件夹内容较多,此处不做赘述。
配置视图url
要想请求上述创建的两个视图函数,需要现在应用的urls.py(detector/urls.py)中配置这两个视图的url
1 | # detector/settings.py |
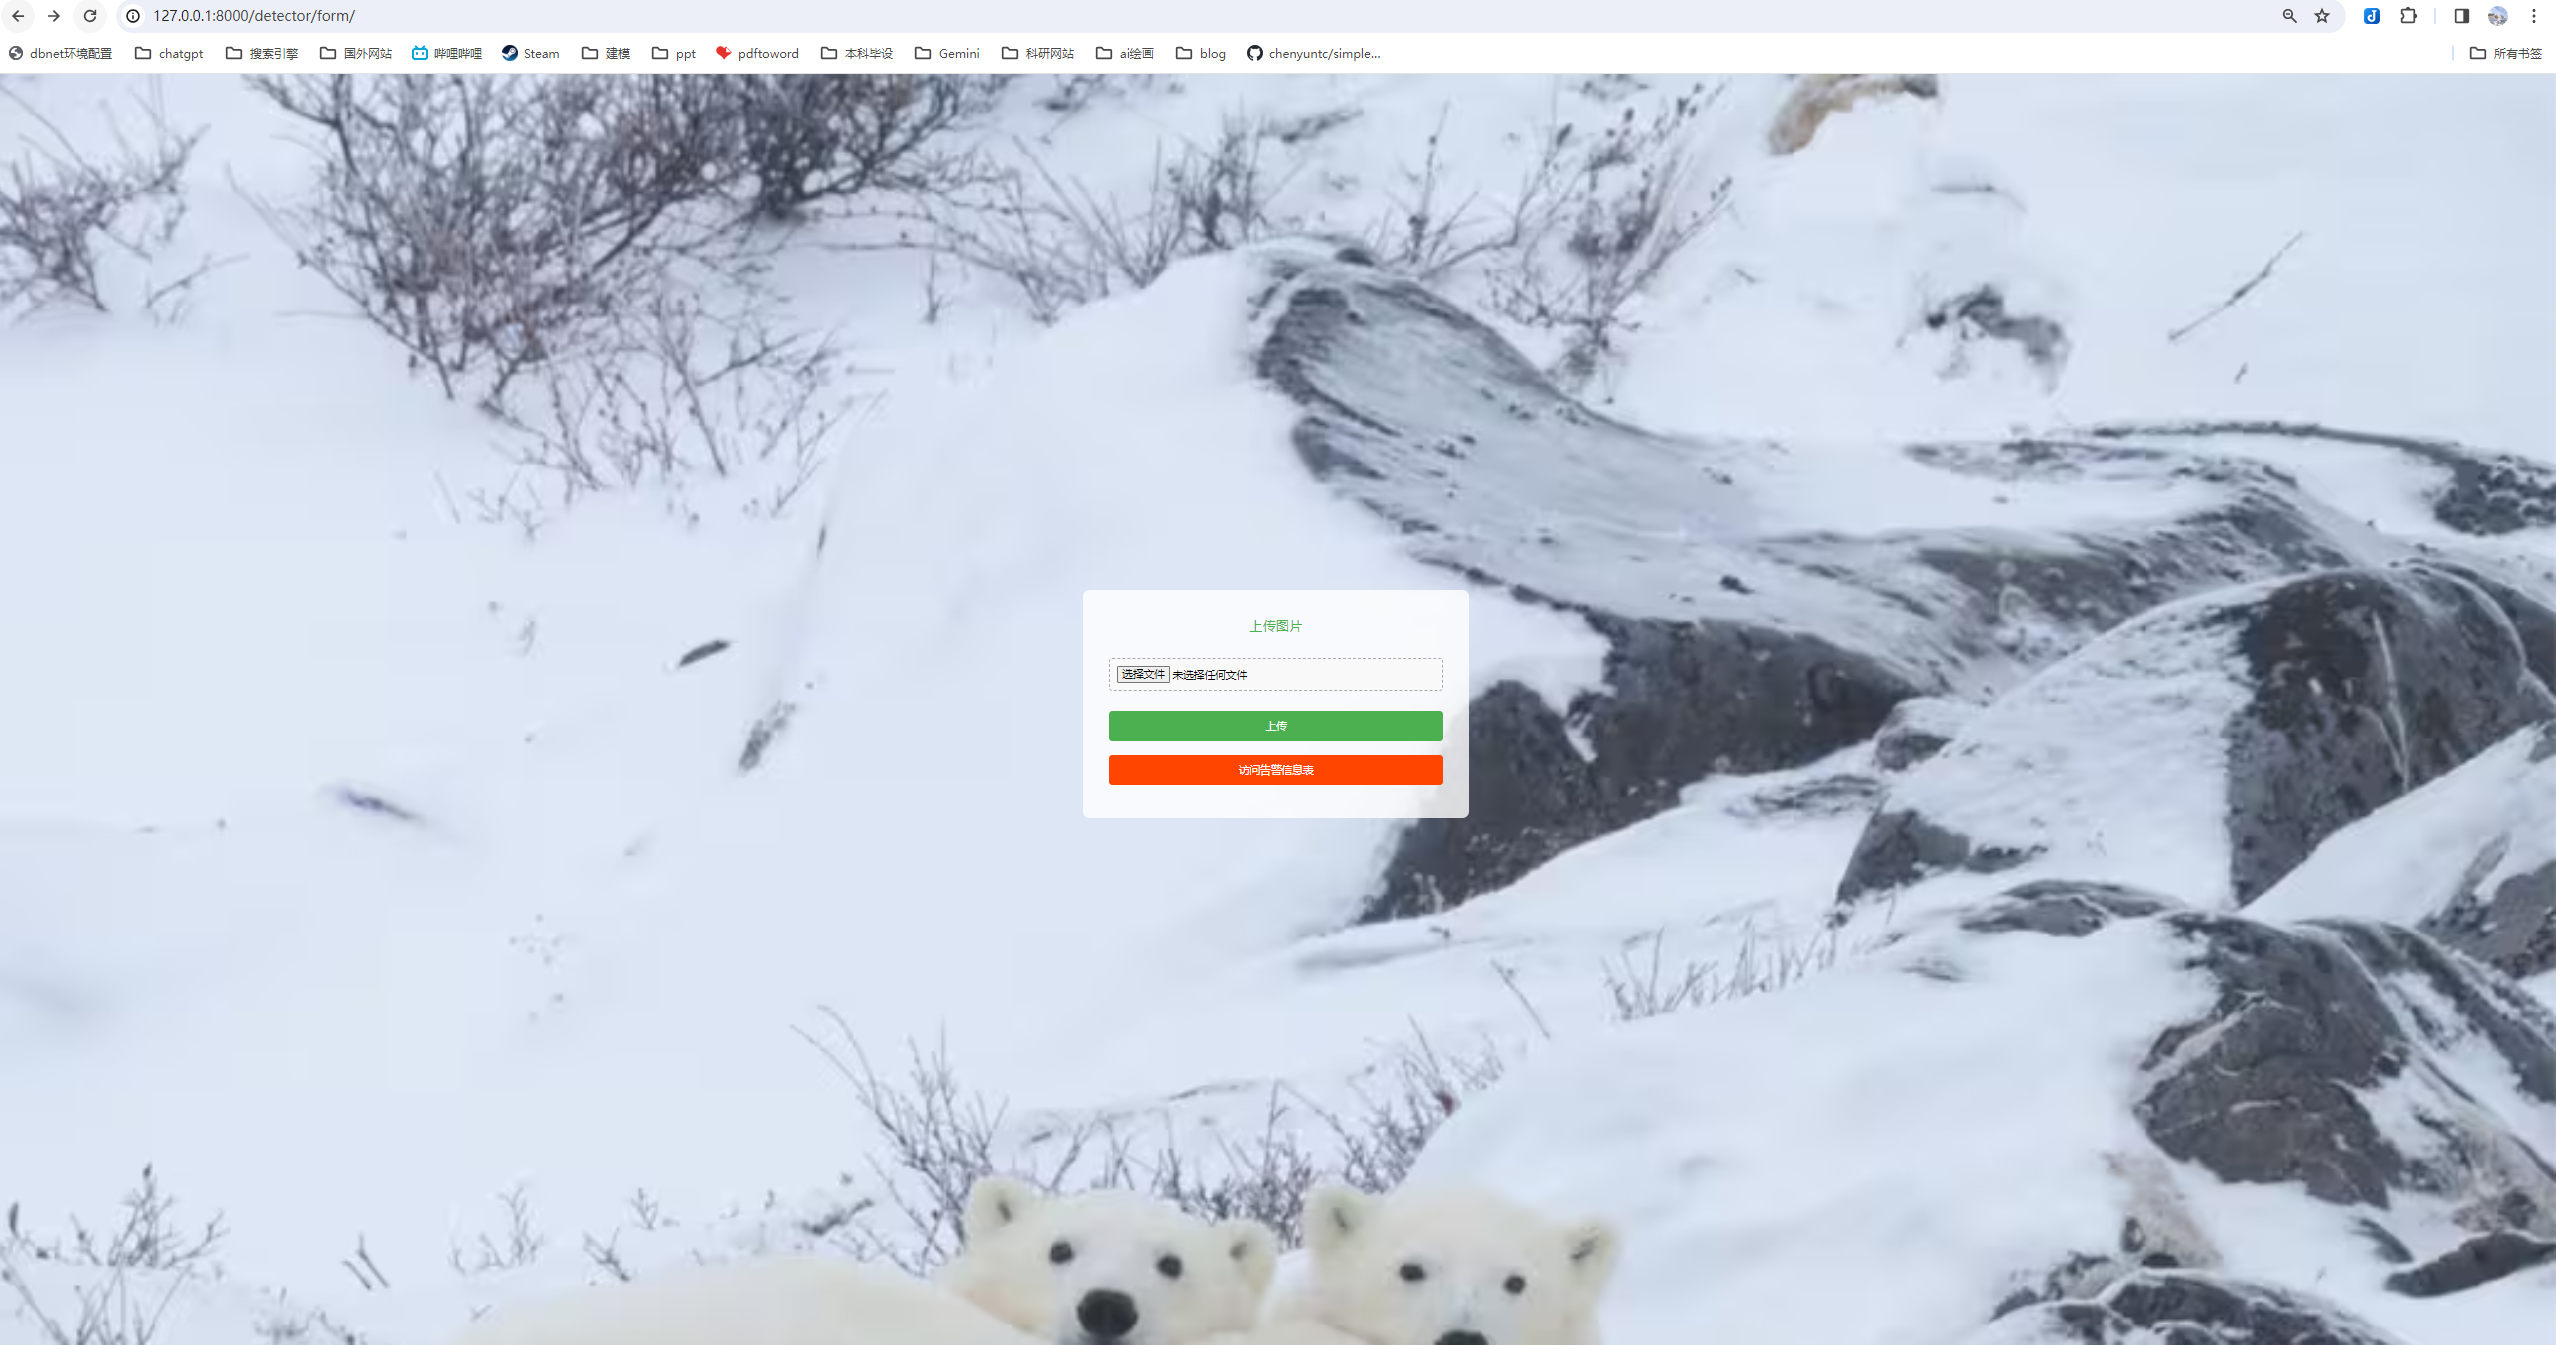
要想访问form_view()函数,在启动服务器后访问链接
http://127.0.0.1:8000/detector/form/,同理要想访问handle_upload()函数,只需访问http://127.0.0.1:8000/detector/handle_upload/(不过handle_upload()要求使用POST请求访问,直接采取GET请求访问会返回一条错误信息,因此我们会在访问form_view()后渲染出detector/form.html,在这个表单上传文件,就可以采用POST请求正确访问handle_upload()函数,获得对应的响应)
渲染模板文件
我们会将一个应用使用的模板文件全部放入应用目录下的templates目录下(即detector/templates/),Django会默认在这个目录下寻找模板。
创建好模板文件后的目录结构如下:
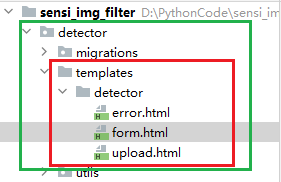
这里还在templates目录下创建了一个detector子目录,在子目录下才放置了模板文件
form.html这里新建的detector子目录起到划分命名空间的作用。因为如果在不同的应用程序中具有相同名称的模板,Django 将无法区分它们,所以需要设置命名空间。
那么,模板文件form.html的内容如下:
1 | <!-- form.html --> |
注意:
- 需要在
<form>表单内部增加这行代码:{% csrf_token %},否则会报错Forbidden (CSRF token missing.): /detector/form/action属性值表示点击submit时会将表单提交到什么位置,这里用了软编码"{% url 'detector:handle_upload' %}",其中detector:表示程序命名空间,与detector/urls.py中的(app_name="detector")相对应;handle_upload表示要将提交到handle_upload这个url路径,与detector/urls.py中的path("handle_upload/", views.handle_upload, name="handle_upload"),中的name相对应- 最头部的
{% load static %}需要添加上,只有这样才能加载到项目的setting.py中配置的static默认路径,才能加载到我们的css和images静态文件
当通过form.html提交表单后,表单信息被正确提交到upload_handle()视图,经过handle_upload()函数处理,会将响应的context传递给模板文件upload.html进行渲染,这部分的对应代码为:
1 | context = {'message': statement, 'isSensitive': isSensitive} |
模板文件upload.html的内容如下:
1 | {% load static %} |
至此,项目的主体内容就已经完成。
项目演示
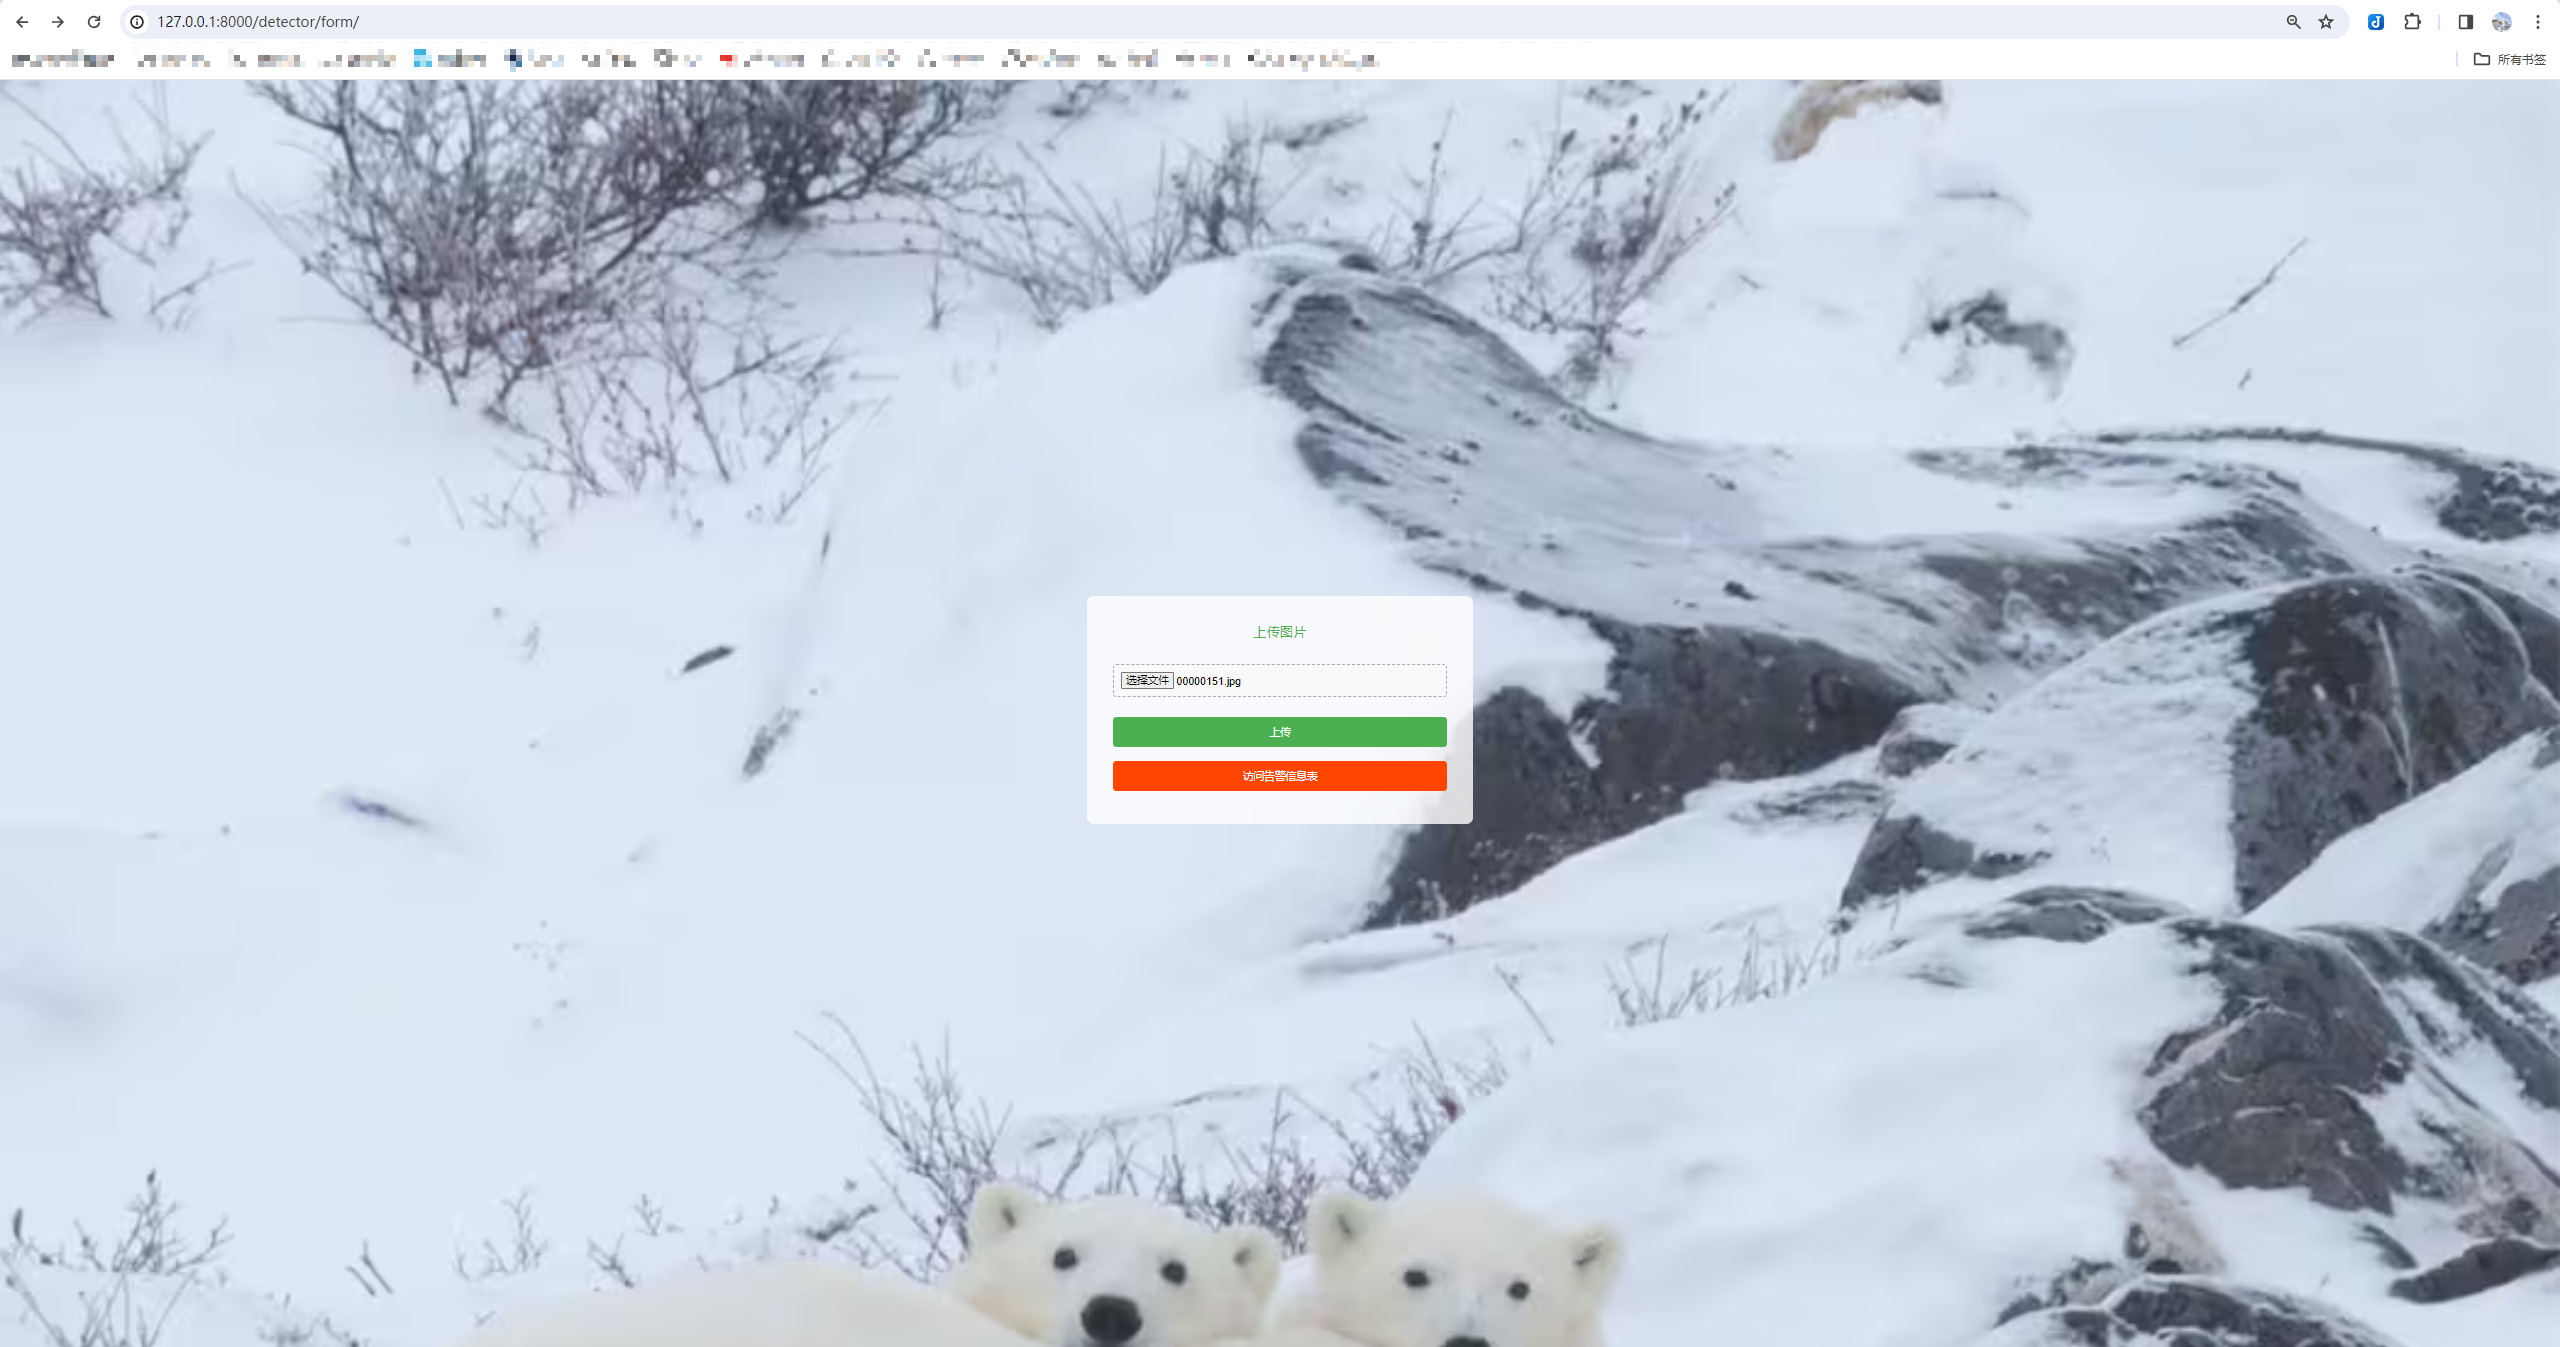
上传图片:
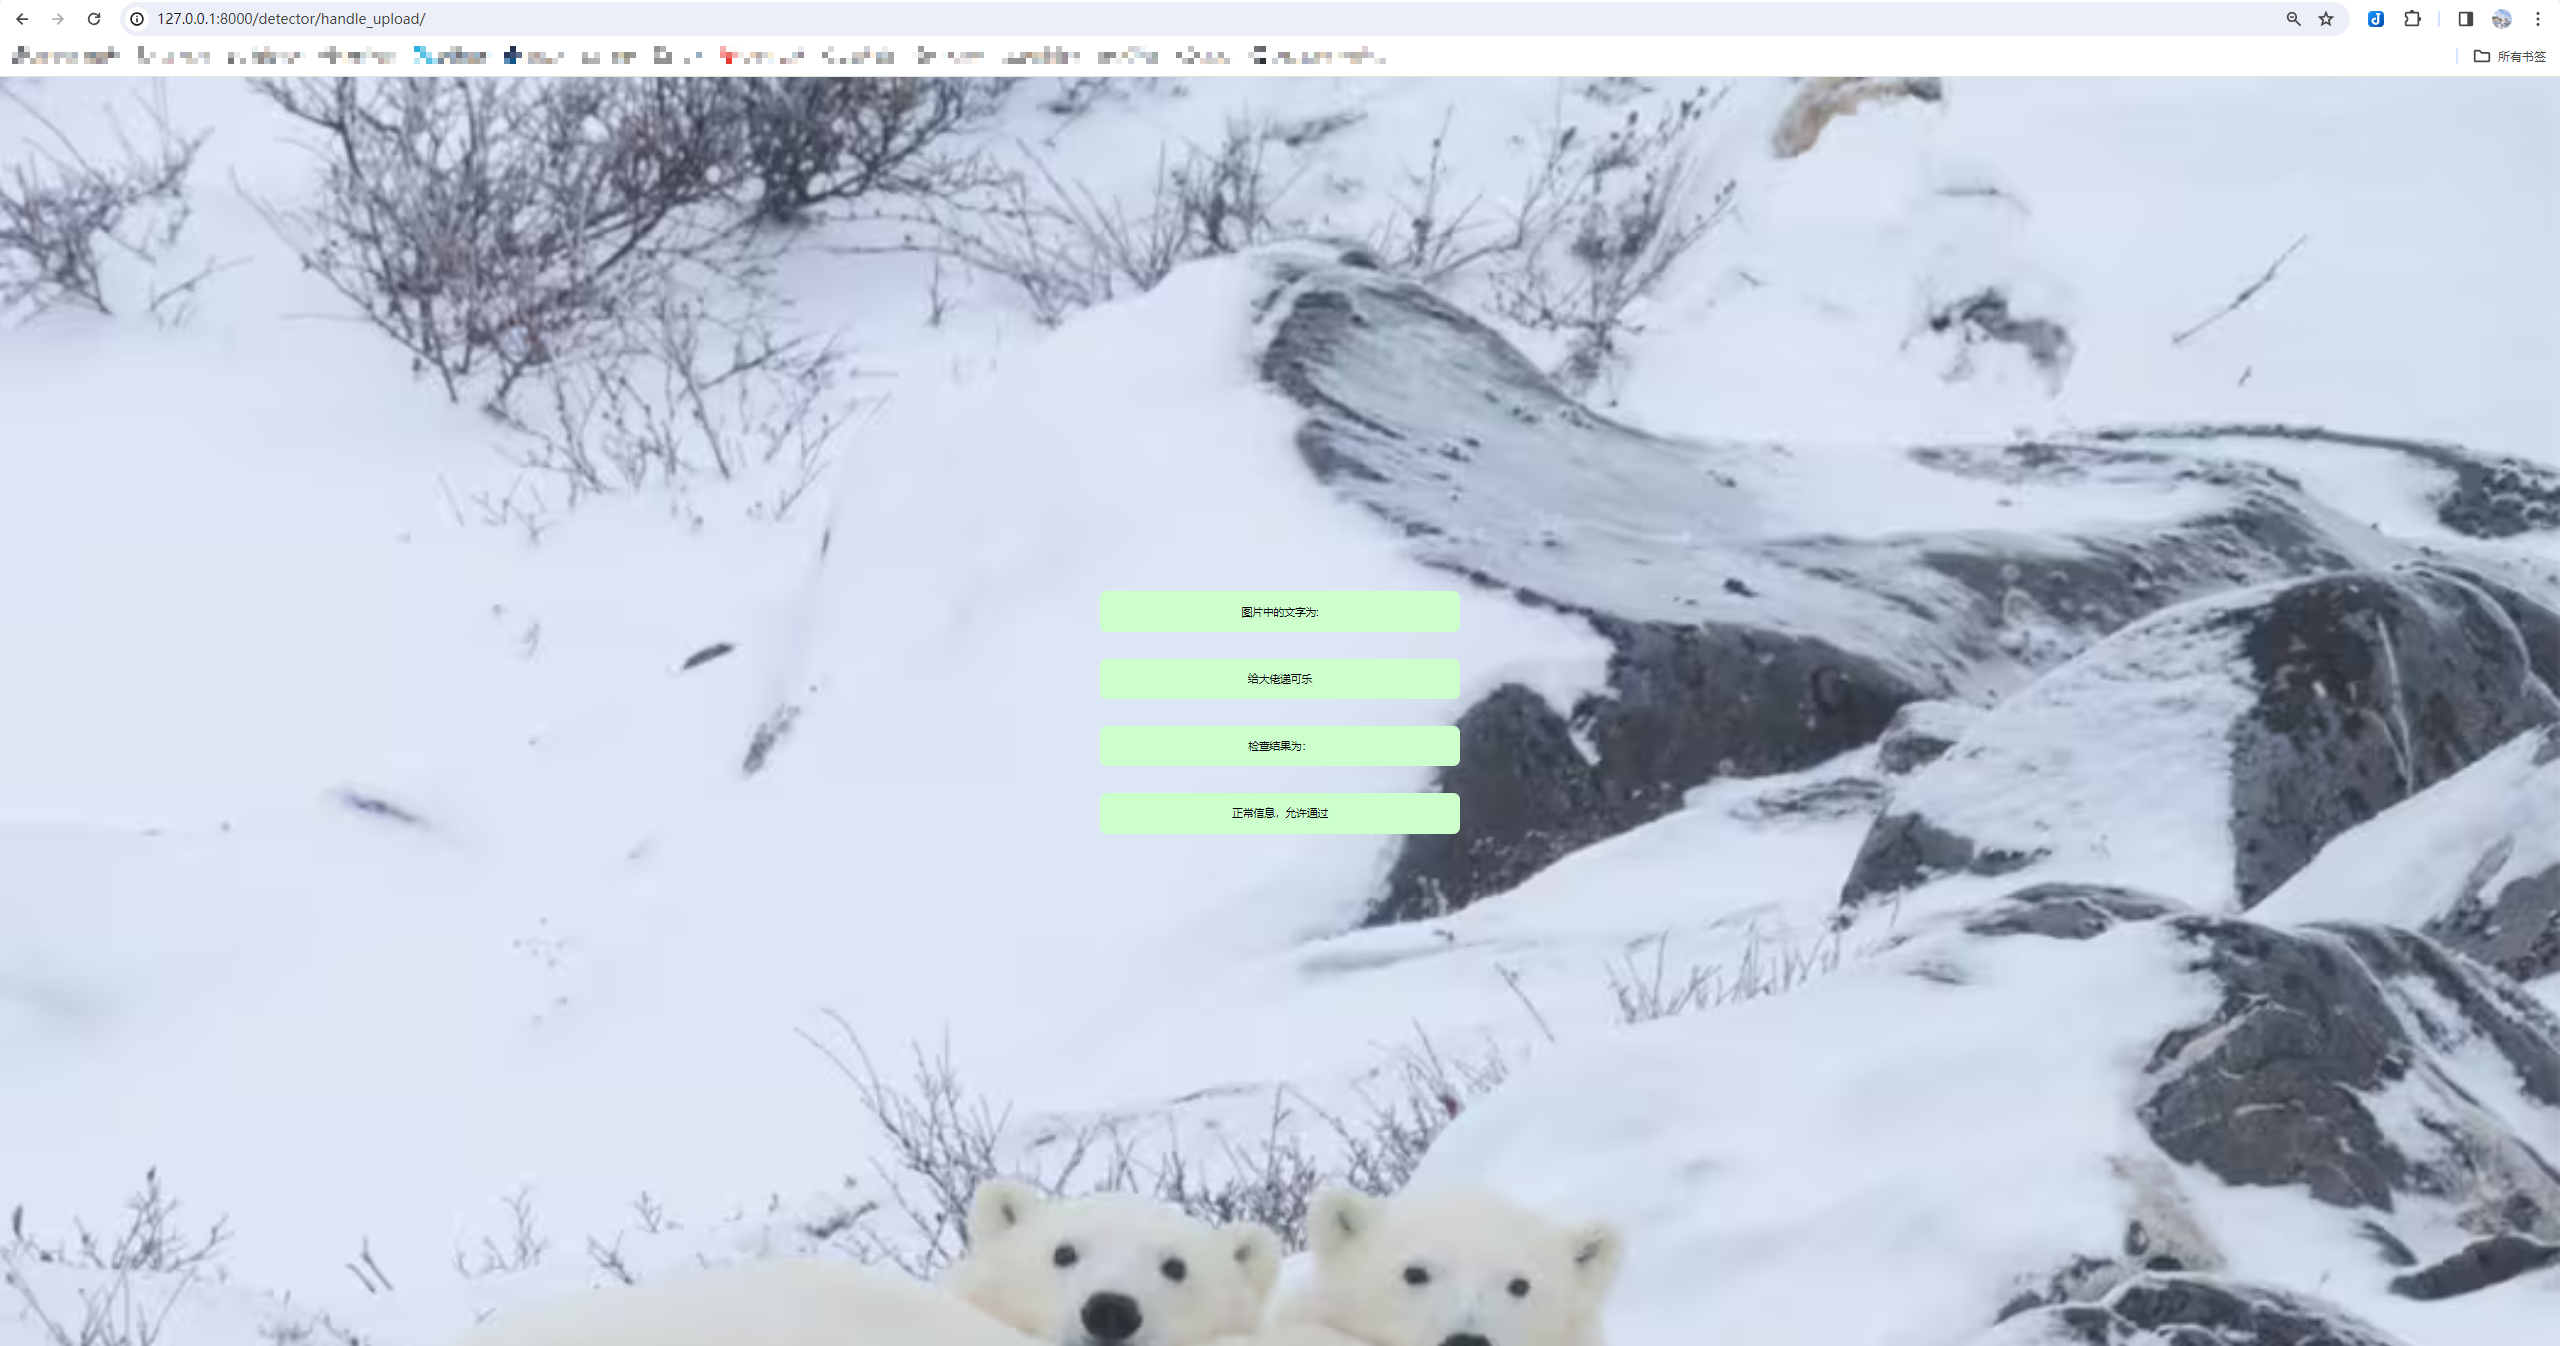
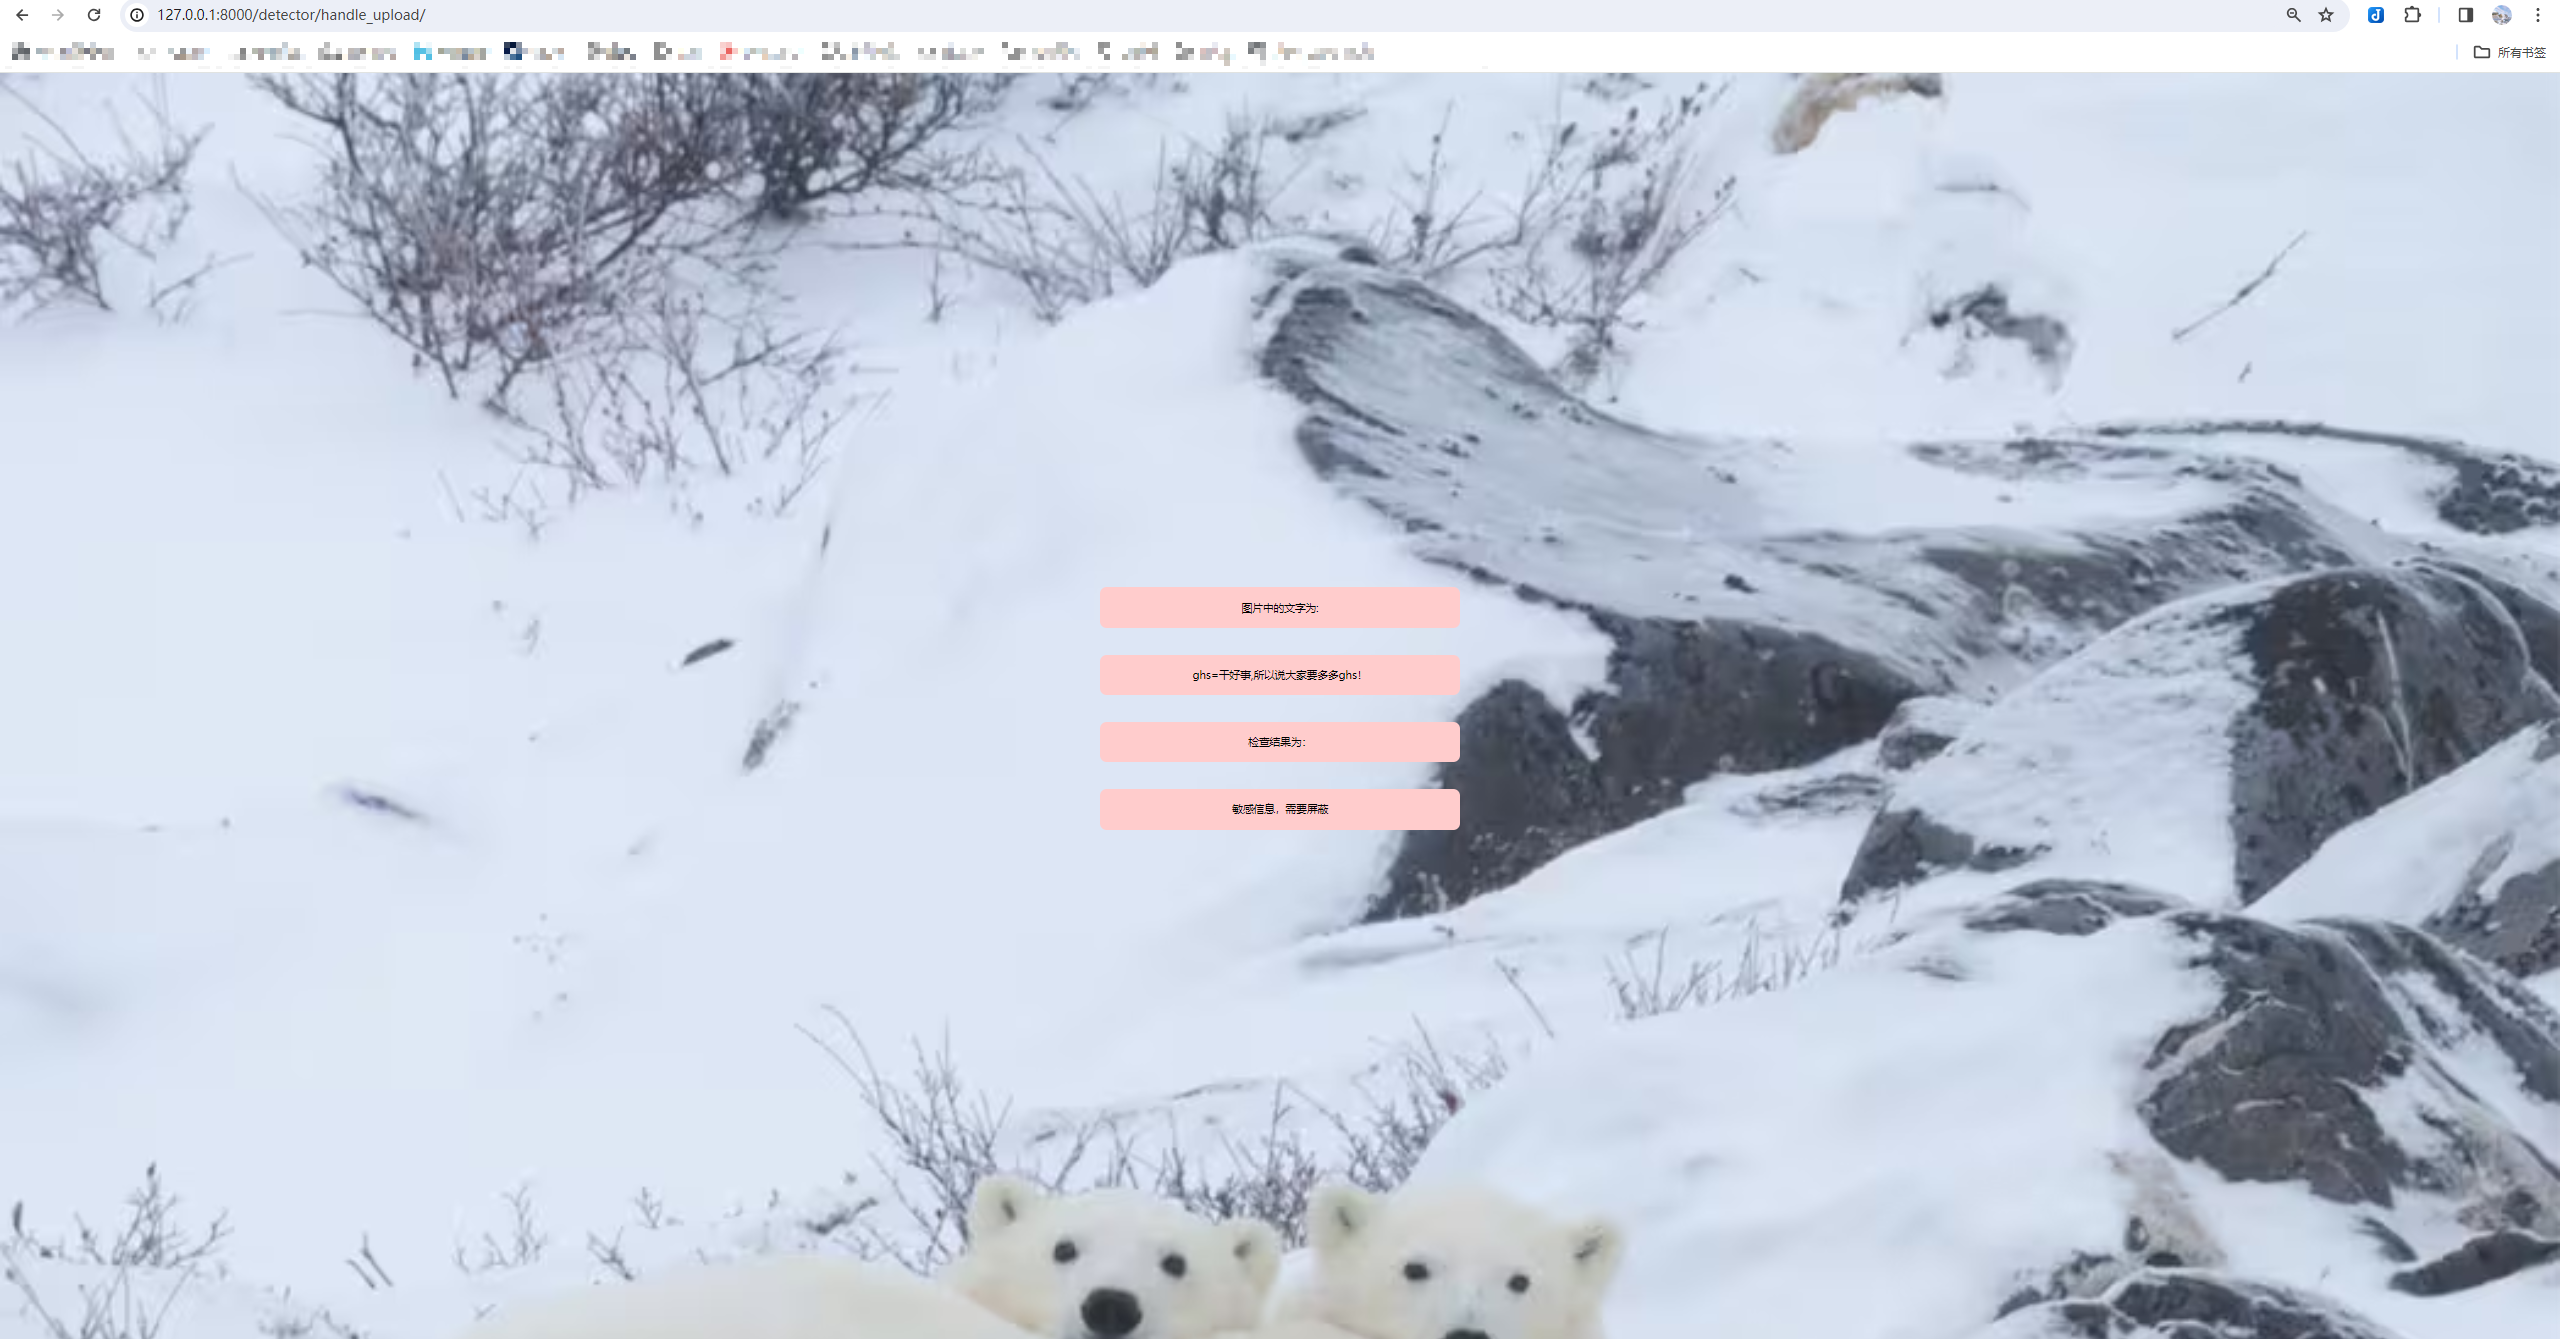
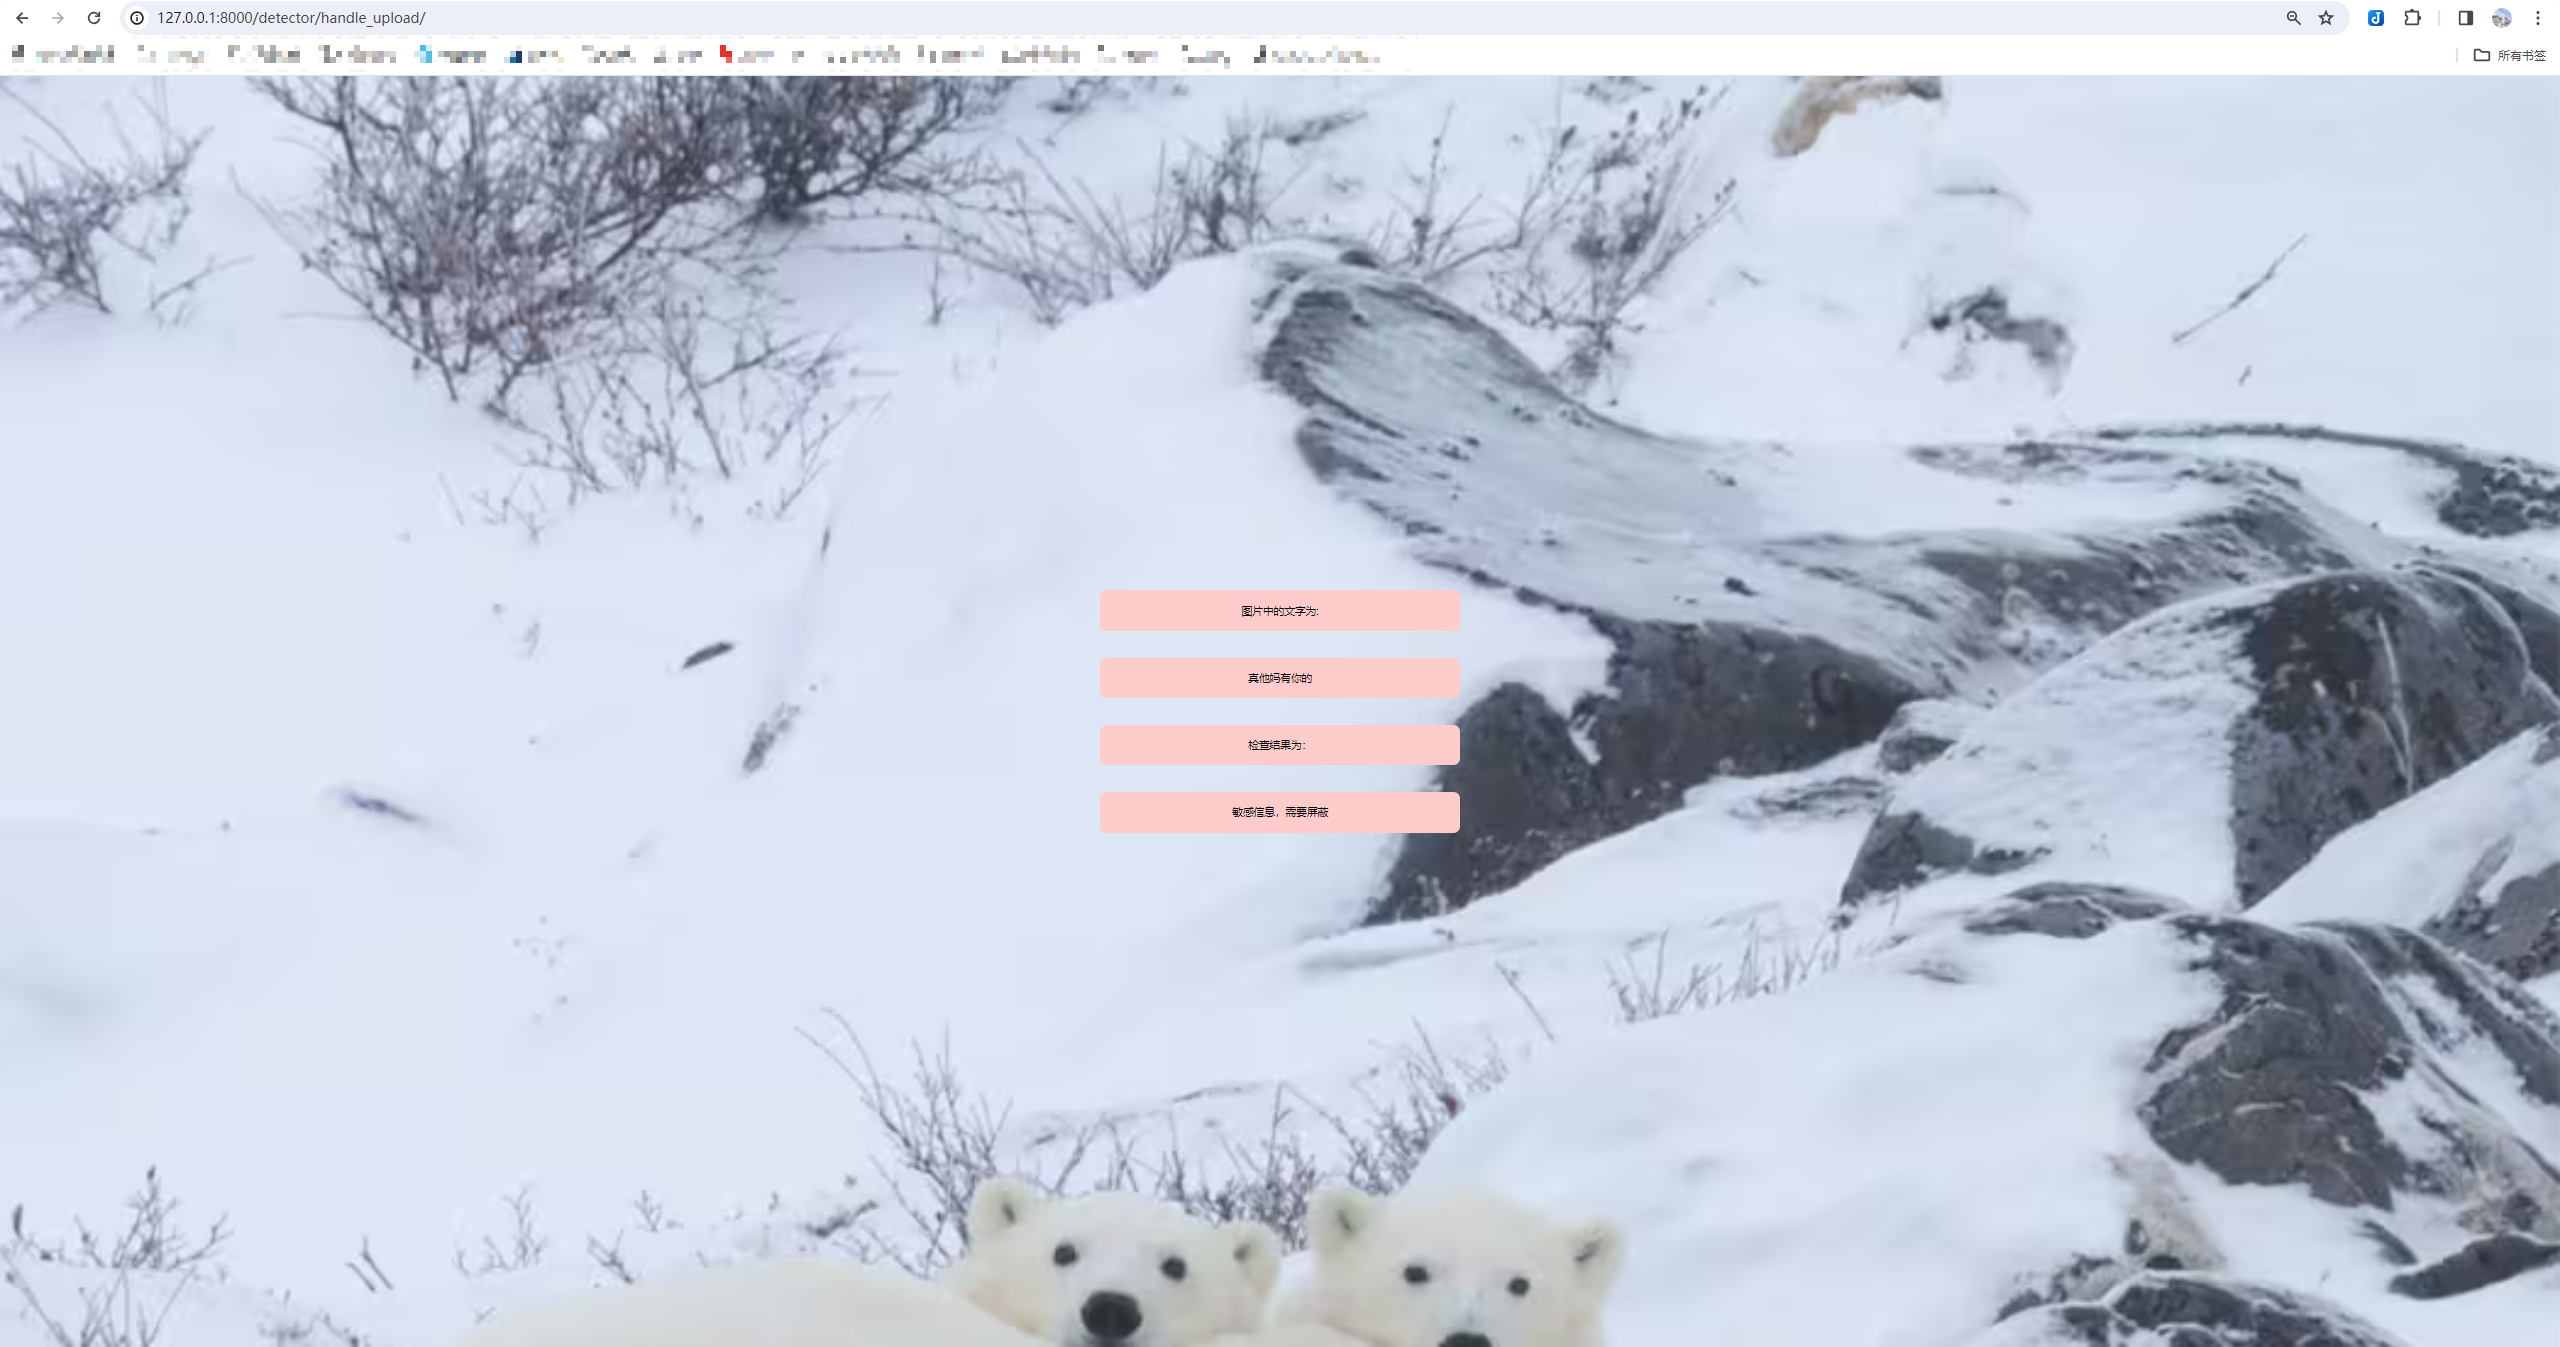
结果展示:
查看告警信息表