服务器端使用docker部署项目
服务器端使用docker部署项目
Docker介绍
https://developer.aliyun.com/article/381989
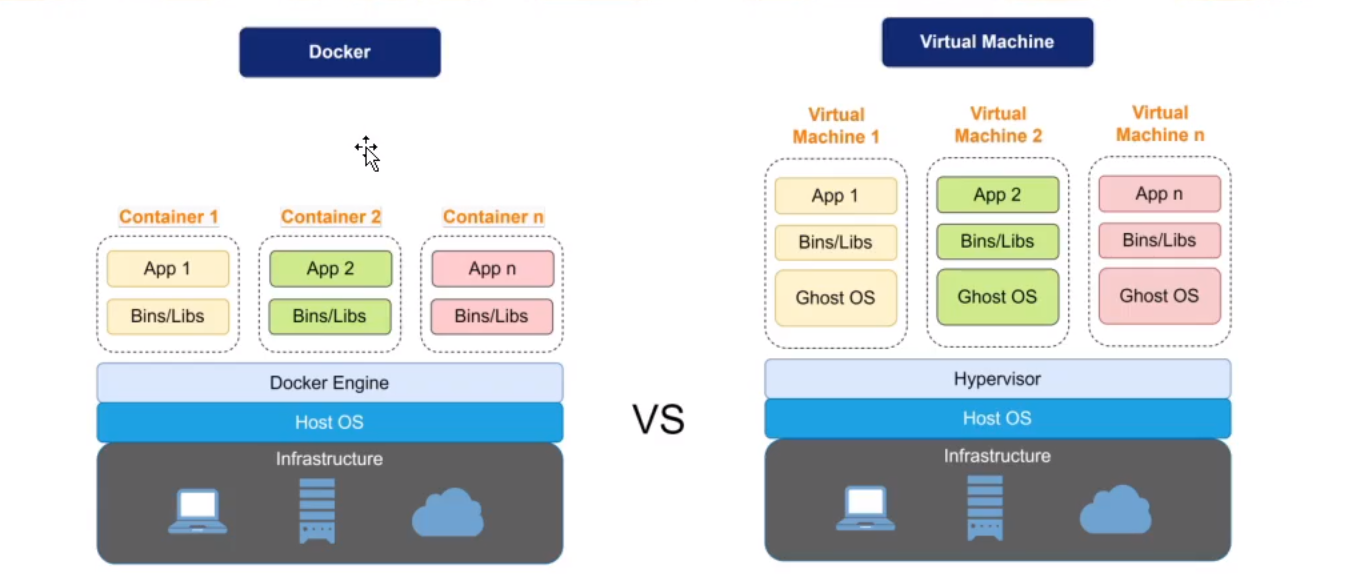
Docker 是一个开源的应用容器引擎,让开发者可以打包他们的应用以及依赖包到一个可移植的镜像中,然后发布到任何流行的 Linux 机器上。使用Docker可以让每个应用彼此相互隔离,在同一台机器上同时运行多个容器,他们彼此之间共享同一个操作系统。Docker的优势在于,它可以在更细的粒度上进行资源的管理,比虚拟化技术性能更高,更加节约资源。下面是普通虚拟化技术和Docker的对比。
Docker的三大核心概念:
- 镜像 - Docker images
- 容器 - Docker containers
- 仓库 - Docker repository
Image
Docker 镜像是 Docker 容器运行时的只读模板,每一个镜像由一系列的层 (layers) 组成。我们可以把Image理解成 windows系统安装光盘,你不能对安装盘进行操作因为是只读的,只有安装好系统后才能保存和操作数据。
container
容器是Image的一个实例,有点像面向对象里new 一个实例。容器类似于一个轻量级的沙盒,Docker利用容器来运行和隔离应用。容器从Image启动时,Docker会在镜像的最上层创建一个可写层,镜像本身保持不变。
Repository
Docker 仓库是存放镜像的地方。不要把Docker的仓库和注册服务器Registry混淆。注册服务器是存放仓库的地方,每个仓库存放某一类不同标签Tag的镜像。

Docker 仓库也有公有和私有的概念。公有的 Docker 仓库名字是 Docker Hub。Docker Hub 提供了庞大的镜像集合供使用。这些镜像可以是自己创建,或者在别人的镜像基础上创建。如果你的镜像为私有镜像,不想发到公网上,可以自己在本地创建一个私有的镜像仓库
Docker engine安装
https://docs.docker.com/engine/install/ubuntu/
Set up Docker's
aptrepository.1
2
3
4
5
6
7
8
9
10
11
12
13# Add Docker's official GPG key:
sudo apt-get update
sudo apt-get install ca-certificates curl
sudo install -m 0755 -d /etc/apt/keyrings
sudo curl -fsSL https://download.docker.com/linux/ubuntu/gpg -o /etc/apt/keyrings/docker.asc
sudo chmod a+r /etc/apt/keyrings/docker.asc
# Add the repository to Apt sources:
echo \
"deb [arch=$(dpkg --print-architecture) signed-by=/etc/apt/keyrings/docker.asc] https://download.docker.com/linux/ubuntu \
$(. /etc/os-release && echo "$VERSION_CODENAME") stable" | \
sudo tee /etc/apt/sources.list.d/docker.list > /dev/null
sudo apt-get updateInstall the Docker packages.(碎碎念:这里下载好慢呀)
1
2
# 安装最新版本
sudo apt-get install docker-ce docker-ce-cli containerd.io docker-buildx-plugin docker-compose-plugin1
2
3
4
5
6
7
8
9
10# 安装特定版本
## 列出所有可用版本
apt-cache madison docker-ce | awk '{ print $3 }'
5:24.0.0-1~ubuntu.22.04~jammy
5:23.0.6-1~ubuntu.22.04~jammy
...
## 安装特定版本
VERSION_STRING=5:24.0.0-1~ubuntu.22.04~jammy
sudo apt-get install docker-ce=$VERSION_STRING docker-ce-cli=$VERSION_STRING containerd.io docker-buildx-plugin docker-compose-plugin安装成功后,docker服务会自动开启。
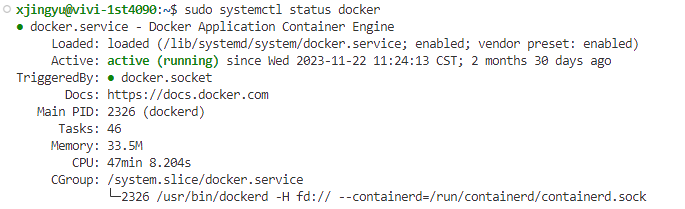
检查docker状态
1
sudo systemctl status docker
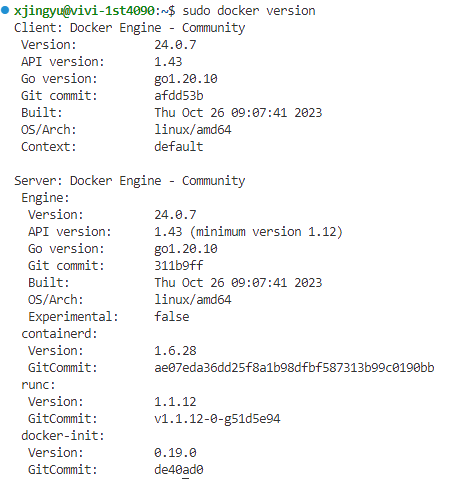
检查安装好的docker版本/配置信息
1
docker version
1
docker info
配置Docker镜像源
Docker Hub(https://hub.docker.com/)是一个公开的镜像仓库,用于下载镜像,在国内下载速度很慢,所以我们通常需要配置阿里云镜像。
在阿里云容器镜像服务网页端操作https://cr.console.aliyun.com/cn-shanghai/instances
- 创建个人实例
- 在镜像工具-镜像加速器获取镜像地址(https://fzmbrlfd.mirror.aliyuncs.com)
在服务器端操作
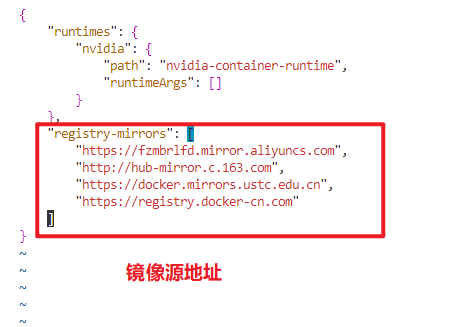
修改
/etc/docker/daemon.json,增加国内镜像源地址1
sudo vi /etc/docker/daemon.json
1
2
3
4
5
6
7
# 阿里云的镜像是针对账号自定义的,其他几个是通用的
"registry-mirrors": [
"https://fzmbrlfd.mirror.aliyuncs.com",
"http://hub-mirror.c.163.com",
"https://docker.mirrors.ustc.edu.cn",
"https://registry.docker-cn.com"
]重新加载配置
1
sudo systemctl daemon-reload
重启服务
1
sudo systemctl restart docker
在服务器端检查配置是否成功
打印docker信息:
sudo docker info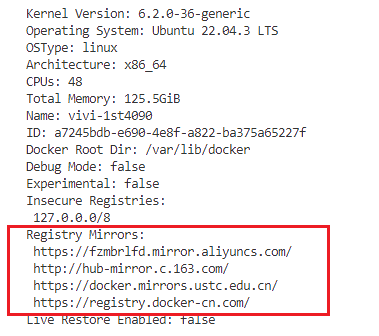
拉取测试用的镜像hello-world:
sudo docker pull hello-world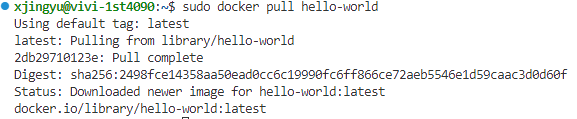
Docker基本操作
镜像
https://www.runoob.com/docker/docker-image-usage.html
docker images:查看当前的所有镜像
docker rmi <镜像名>:删除镜像
容器
运行
https://www.runoob.com/docker/docker-container-usage.html
docker run -it hello-world /bin/bash:启动容器
-i: 交互式操作 -t: 终端 hello-world: hello-world 镜像 /bin/bash:放在镜像名后的是命令,这里我们希望有个交互式 Shell,因此用的是 /bin/bash。
exit:退出终端
docker exec -it <容器 ID> /bin/bash:在运行的容器中运行命令
docker exec 命令会退出容器终端,但不会导致容器的停止
删除
容器是镜像的运行实例。要删除镜像,就要先删除运行在其上的容器;而要删除容器,先要停止容器。所以在删除容器/镜像时的一般流程为
1 | # 查看运行中的容器 |
提升权限
要想在服务器端的命令行直接使用docker xxx命令,而不用在其前面加"sudo"才能执行命令,可以执行以下操作提升权限。
1 | ##执行docker命令不加sudo的方法 |
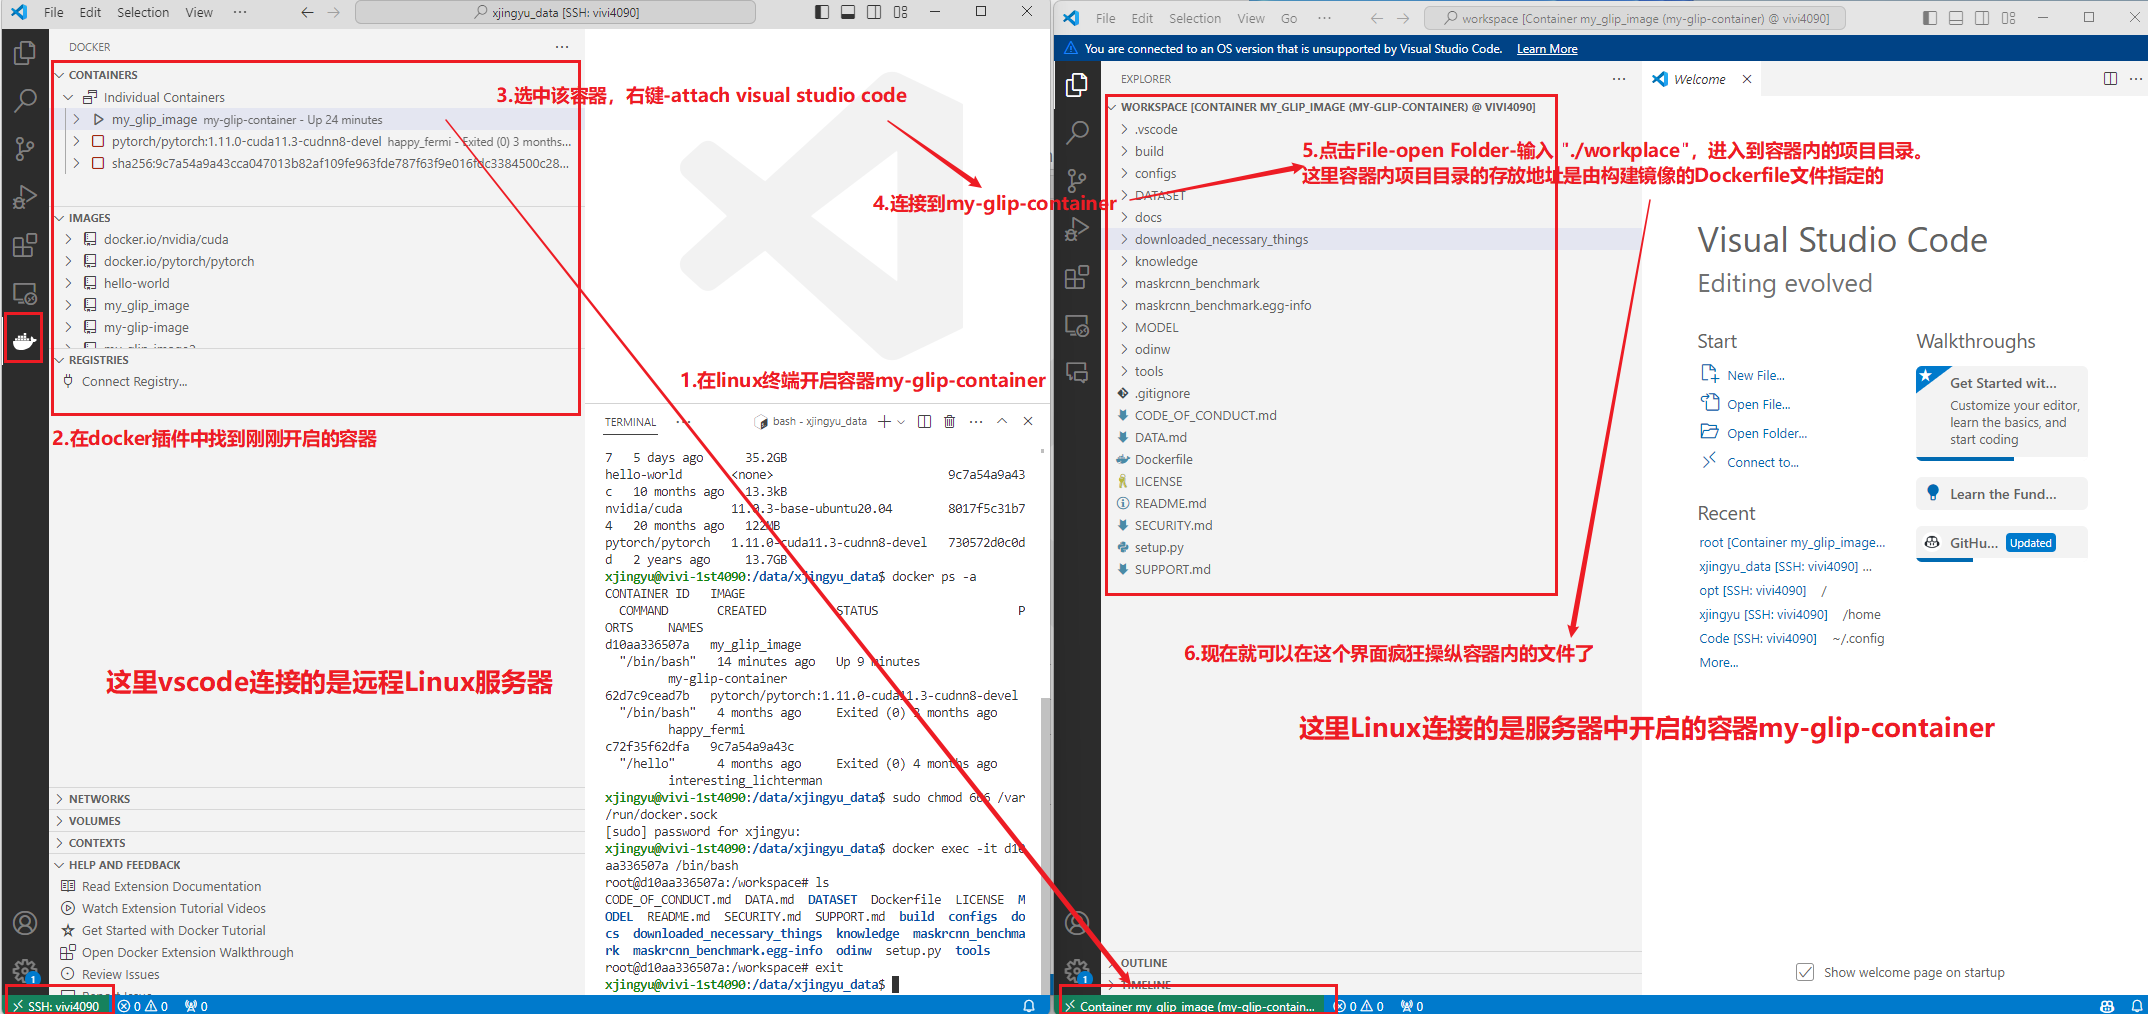
vscode连接远程容器container
当我们构建docker容器后,往往需要对其中存放的项目代码等进行一定的修改(如配置文件等),这时通过命令行执行难以清晰明了地搞清楚每次操作具体发生了什么改变,因此可以借助vscode的Docker插件,让vscode直接连接远程容器(类似于vscode连接远程服务器),这样我们就可以在vscode的界面看到容器中的目录结构,并进行可视化的直接修改。
实例测试
下面创建一个基于pytorch环境的镜像实例,操作步骤如下
拉取镜像
1
docker pull pytorch/pytorch
进入镜像/运行容器
1
docker run -it pytorch/pytorch(it表示交互性展示)
查看现有文件
1
2
cd ..
ls测试现有依赖
1
2
3
4
5
6
7
8
# 测试有无python
python
# 测试有无pytorch
import torch
exit()
# 测试有无pip
pip list增加其他依赖:
1
pip install xxx -i https://pypi.tuna.tsinghua.edu.cn/simple
将本地的数据和代码复制到服务器端特定的docker容器中
1
2
3
# 1.在本地数据和代码所在的文件夹内运行git bash
# 2.docker cp ../xxx [docker容器id]:yyy (在特定docker容器新建yyy文件夹,将本地文件夹xxx内容复制到其中)
docker cp [本地文件夹位置] [docker容器id]:yyy
提交自定义的镜像
- 在阿里云新建镜像仓库
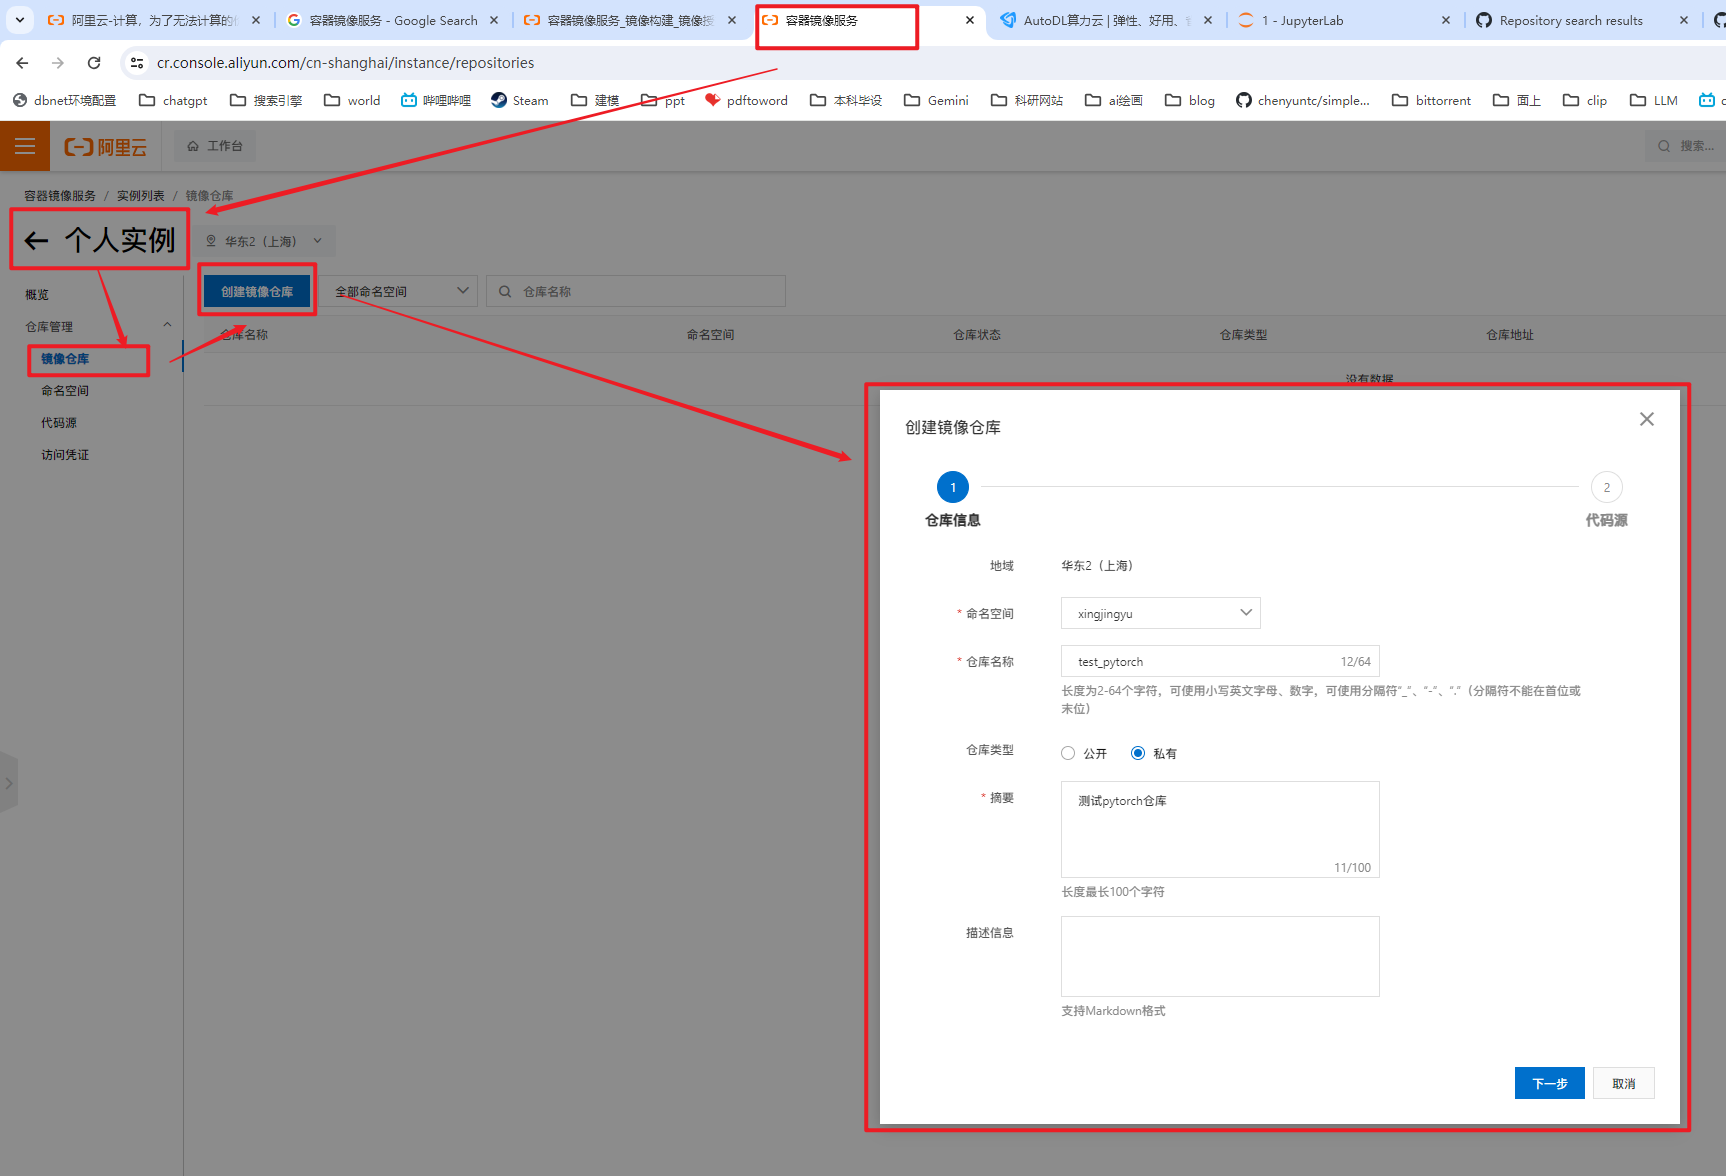
- 选择本地仓库-创建镜像仓库
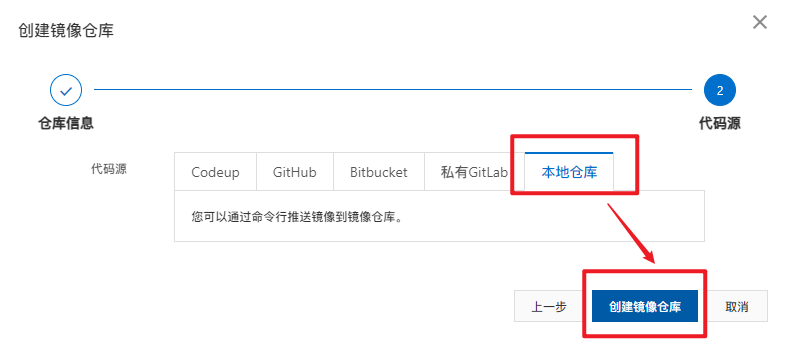
- 仓库创建完成后,按照操作指南操作
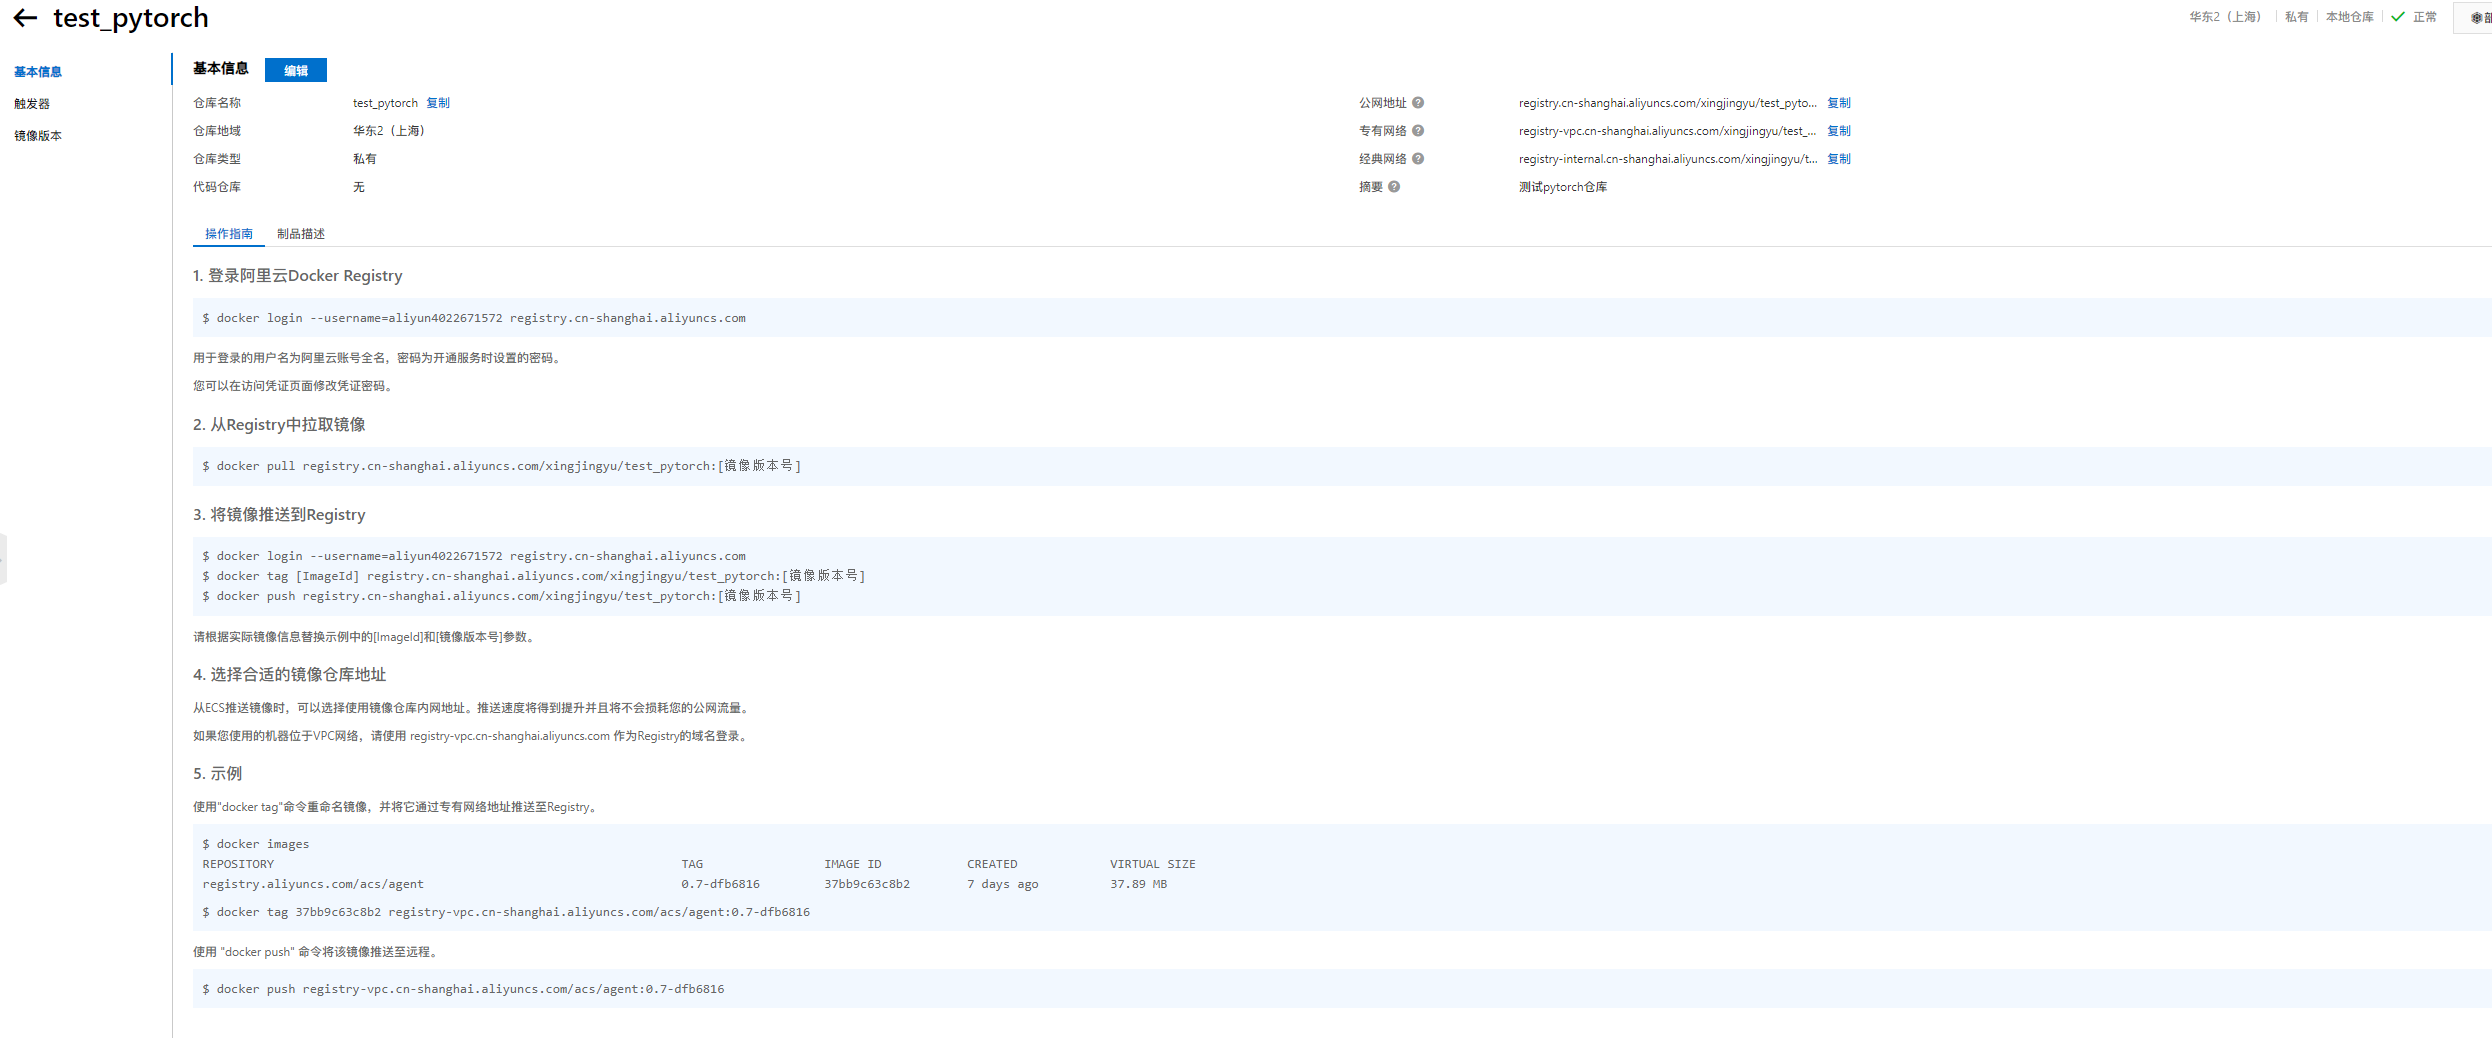
- 登录阿里云Docker Registry
1 | docker login --username=aliyun4022671572 registry.cn-shanghai.aliyuncs.com |
用于登录的用户名为阿里云账号全名,密码为开通服务时设置的密码vQ4bBe.3!!Vi269
- 从Registry中拉取镜像
1 | docker pull registry.cn-shanghai.aliyuncs.com/xingjingyu/test_pytorch:[镜像版本号] |
- 将镜像推送到Registry
1 | docker login --username=aliyun4022671572 registry.cn-shanghai.aliyuncs.com |
请根据实际镜像信息替换示例中的[ImageId]和[镜像版本号]参数
参考资料
https://developer.aliyun.com/article/381989
https://docs.docker.com/engine/install/ubuntu/
https://hub.docker.com/
https://cr.console.aliyun.com/cn-shanghai/instances
https://www.runoob.com/docker/docker-image-usage.html
https://www.runoob.com/docker/docker-container-usage.html